Recently we have posted a tutorial on How to Configure Source Based Routing and Source Interface Based Routing. Now we collected step by step procedure to configure Source Based Routing in Juniper Networks via WebUI or CLI.
To configure a source-based route, perform the following steps via the WebUI or CLI:
To Configure Source Based Routing via WebUI
1. Step one: Open the WebUI. For an example of how to access the WebUI, consult: KB4060 – Accessing Your NetScreen, SSG, or ISG Firewall Using the WebUI
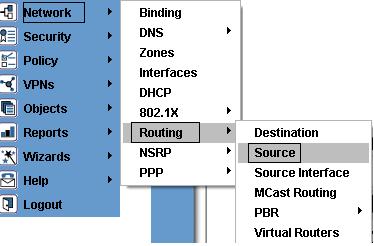
2. Step two: From the NetScreen options menu, click Network, select Routing, and then click Source Routing.
3. Step three: From the Source Routing drop-down menu, click to select your virtual router.
4. Step Four: Click New.
5. Step Five: In the Network Address/Netmask text boxes, enter a Network Address and a Netmask.

6. Step Six:In the Interface drop-down menu, click to select an Interface. In the Gateway IP Address text box, enter a Gateway IP Address.
Note: Metric indicates the metric associated with the route.
7. Step 7: Click OK.

Note: This is what the source-based route entry looks like on the Source Routing table page.
To Configure Source Based Routing via CLI
From the CLI, an example configuration is as follows:
>set vrouter "VR-1025" route source 192.168.1.0/24 interface ethernet0/2 gateway 10.1.1.1 metric 1

>set vrouter "VR-1025"  source-routing enable
To view the source routing table use this command :
>get vrouter "VR-1025" route source
Reference Article: Juniper knowledge Base
Leave a Reply